There are passionate landscape photographers who get up in the middle of the night, climb a mountain for hours with heavy equipment and work very seriously and freezing in the sleet on their composition – until finally the redeeming blue hour dawns and they can take a mega photo! But there is another way…
Page Contents (click line to jump the text)
Intro
I love beautiful landscapes, I love being outdoors, I love hiking and I also love taking landscape photos. But I hate tripods, I like to get up later and landscape photography has to fit into my travel plans and not the other way round.
That’s about the difference between going on a photo trip – to take photos, and going on a trip – and documenting it photographically.
I do the latter, as I’m sure you’ve already heard. Photography is a wonderful hobby. But for most of us, it has to fit into our real lives.
And most of us won’t be travelling alone, but with non-photographing spouses (like me) or friends, or with the whole family. On a trip like this, it’s not all about the super-duper-mega-photo that is heroically achieved. Right?
(Photo travellers and experienced enthusiasts may forgive me for these statements, but you are not my target group for this article – sorry)
And yet you can still take beautiful landscape travel photos ‘on the side’, so to speak, even with the aforementioned restrictions.
‘Whaaat? Can’t be – how is that possible?’
That’s exactly what this article is about. Below I’ll give you a few simple tips for taking better landscape photos with ANY camera (including smartphones). And these tips are also guaranteed to be family-friendly. Let’s get started…
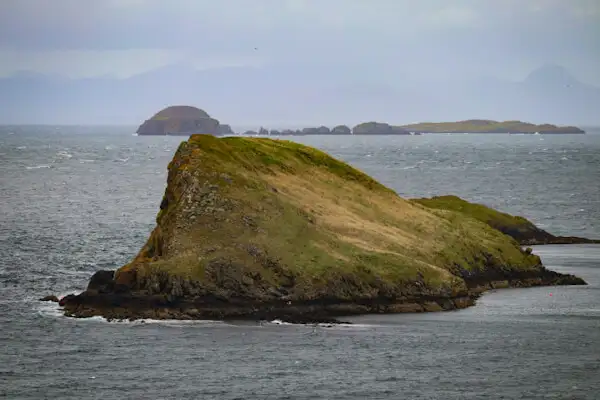
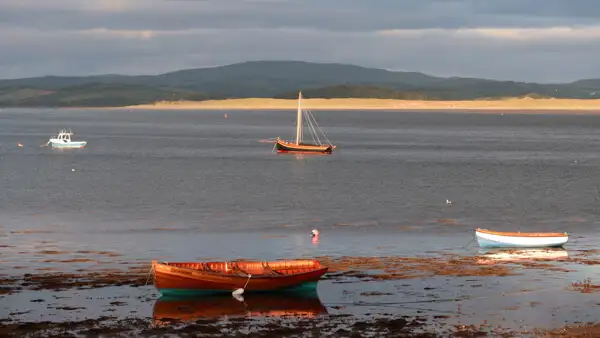
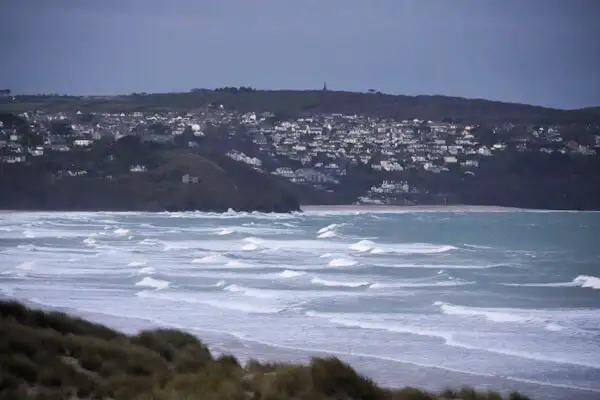
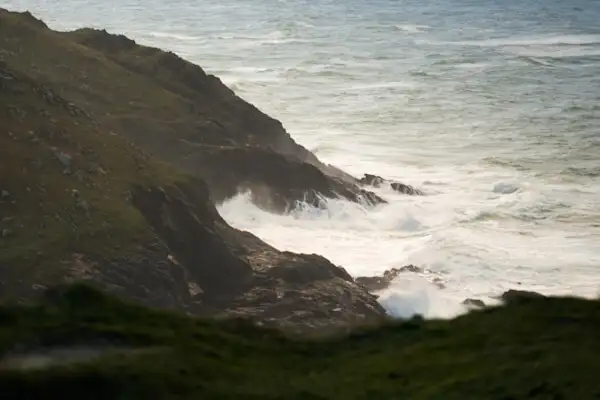
Oh yes, landscapes can also be coasts. In English we speak of landscapes and seascapes, which is a nice term for it.
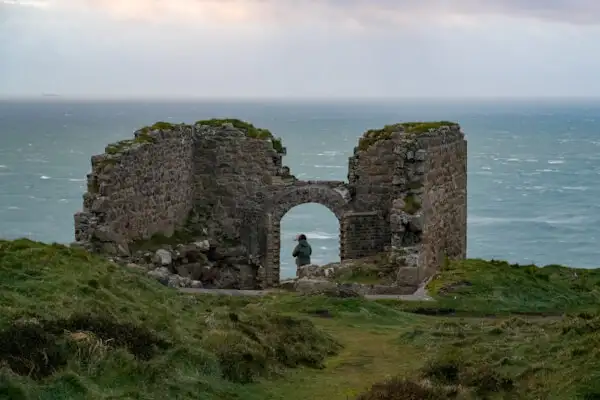
Landscapes can also include objects such as people, cars or even castles in the landscape if the picture is mainly about the landscape.
And ultimately it is also landscape photography if you only photograph a section of the landscape. For example: individual waves, individual trees, individual clouds, individual stones on the beach and so on.
And now a word about my photography: I’m a learning amateur, like you probably are. I’m not saying that my photos are great, but I’ll tell you about my learning process and show you my pictures.
Make up your own mind about what you like and what you don’t like. And now comes the important part: if you like a picture, ask yourself why you like it: and then you’ve already found a good starting point for your own photography that you can take with you.
Tip number 1: It also works without a tripod and only with a smartphone
If you follow landscape photography channels on YouTube, you will often see serious landscape photographers working with lots of equipment and tripods. I don’t mean that in a negative way, because everything has its purpose and high-quality images sometimes require high-quality equipment and a certain amount of effort.
But if you don’t want that, then a camera without a tripod or just a smartphone will do, even in low light. Because newer devices have become pretty good with long exposures.
With my iPhone 13, I can take hand-held photos with an exposure of up to three seconds – the shake is then added together by the smartphone to create a photo.
But even with my camera, I can manage about half a second of hand-held exposure and even longer when placed on a fence post or similar. This is made possible by the sensor stabilisation of the camera in conjunction with the stabilisation of the lens.
You can use this to make a waterfall flow, soften the surf, create deliberate motion blur or take photos at dusk.
Tip number 2: Photograph the blue or golden hour without sleep deprivation!
The golden hour is the period before sunrise or sunset, when the sky glows in the most beautiful yellow and orange colours.
The blue hour is a little earlier still, when the sky first turns bluish and purple before turning golden.
In these minutes, rather than hours, of the day, you have beautiful light at your disposal, which beautifully emphasises and highlights your photo of the cliffs or mountains.
If you don’t feel like getting up at 4am on holiday, or staying up until midnight just to take a golden photo, then don’t do it!
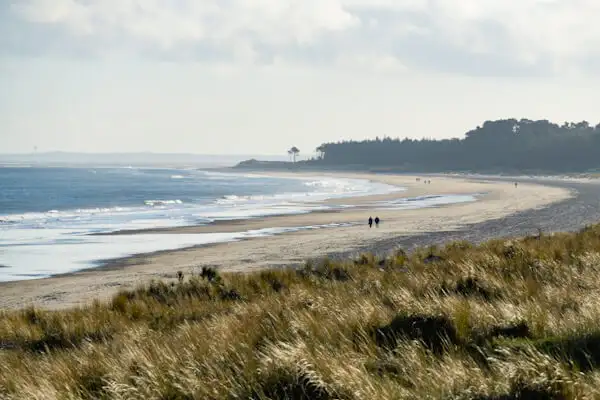
Why not take your photos of the blue hour or golden hour in winter? In our latitudes, sunset is much earlier in the day and sunrise is much later.
I came across this good idea by chance. We have experienced the most beautiful sunrises on a morning walk (around 8.30 am) with our wife and dog on the beach – in Ireland in December (we have had our second home in Ireland for many years).
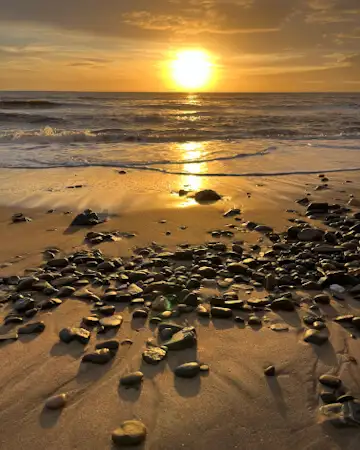
It works the same way in the afternoon, when the sun sets at 5 pm. All you need is reasonably clear weather – and perhaps some warm clothing.
This works better in the north than in the south of Europe, because the sun sets earlier and rises later in the north in winter.
Tip number 3: Learn simple compositions
Composition doesn’t have to be complicated – even if you’re a beginner. With a few simple ‘flags’ you can make your photos much more interesting – no matter which camera (or phone) you use.
By the way, composition only means how you arrange objects in your picture, i.e. which section you choose and which elements you select. What should be in the picture and how – and what should not be in the picture. That’s composition, sounds simple, doesn’t it? But it makes a big difference!
Here are a few possible compositions for your landscape photography:

The rule of thirds
Don’t place the horizon in the centre of the picture, but in the upper or lower third of the picture. Where to now? That depends: If you have a great sky with lots of structure and great light over a moderately interesting landscape, then emphasise the sky and give it more space. If the landscape is more interesting and the sky less so, then emphasise the landscape more.
You can also place objects in the picture not in the centre, but in the right or left third of the picture. For example, a tall tree further to the left and a row of bushes further to the right. This may make your picture a little more dynamic.
Symmetry
Sometimes, however, it also looks better if the tree is exactly in the centre of the picture. This is the case if it is not complemented by something else on the other side (row of bushes).
Symmetry is also when you have a strong object further left in the picture and an equally strong object further right in the picture – this then looks like a mirror image.
If you look at your picture and have the feeling that it ‘tilts’ to one side, then it is not symmetrical. For example, the high cliff on the left and only flat sea on the right. You can compensate for this by giving the sea more space than the cliff, or wait until a ship passes by J. You see what I mean… That way you can visually balance the image.
Diagonal: A row of trees, for example, can run from left to right in the picture, from bottom to top or from bottom left to top right. The diagonal makes the picture more dynamic. This may or may not be intentional. Simply experiment with different compositions.
Focus in the chaos
Have you ever tried taking photos in the forest? You end up not seeing the wood for the trees – literally!

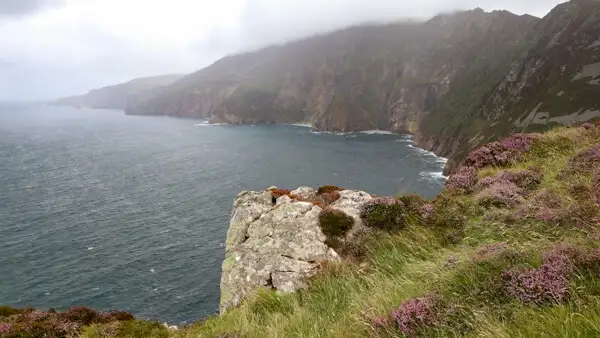
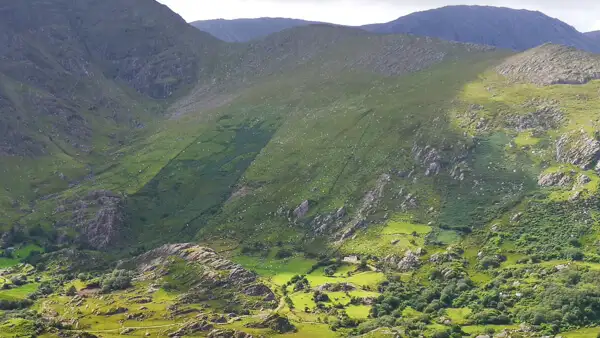
Instead of taking a picture of 100 trees, you can take a photo of a great gnarled oak, or a moss-covered root, or three trees that are nicely positioned in relation to each other. Fog or low-hanging clouds can also help to make the chaotic background disappear somewhat – use this to create a ‘focussed’ image.
This also applies to rocks, mountains or other landscape elements, many of which you can include in the picture – or just one or a few.
Use the telephoto lens more
If you have a telephoto lens, some smartphones also offer a telephoto lens, then use it for landscape photography too. The super wide-angle shot of the mountain range can be wonderfully complemented by individual telephoto photos of beautiful mountain peaks or slopes.
Most cheaper smartphones only have one wide-angle lens, or two of them, like my Iphone 13. And thanks to social media, we’ve all become totally accustomed to wide-angle shots, because everyone takes photos that way.
You can stand out from the crowd with your photos all the more if you get closer every now and then – with the telephoto lens. The tip also goes to myself, because I also tend to take photos with a wide-angle lens (like so many others).
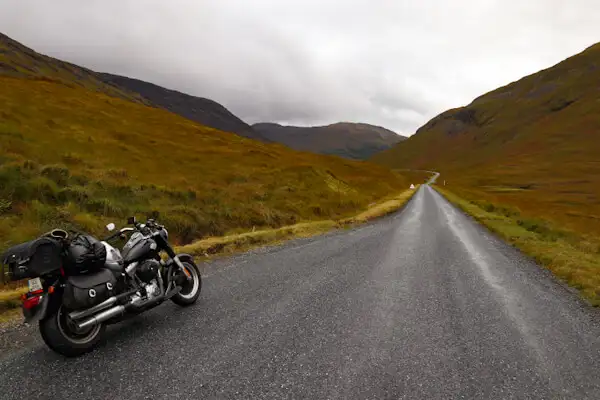
Leading lines
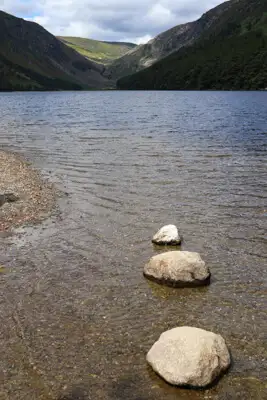
This is a classic in landscape photography: a row of trees leads to a house (Tuscany), or a row of rocks leads to a tree, or a jetty leads the view into the distance to the lake and the mountains beyond.
Wherever you recognise strong lines – let them run towards your object, or into the light in the distance. This can also be a road, a stream, a root running towards a tree, a wall, or whatever lines you can find.
By the way, the leading lines guide the viewer’s eye through the picture – hence the name.
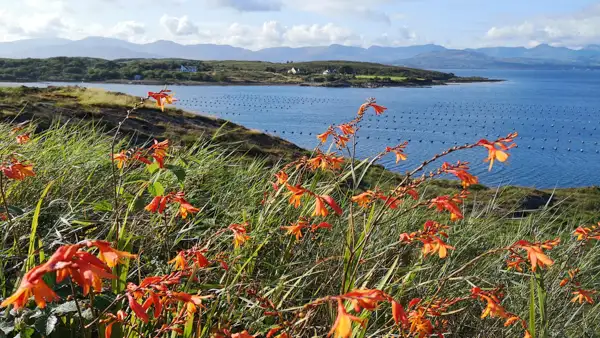
Foreground makes picture healthy – or frame it!
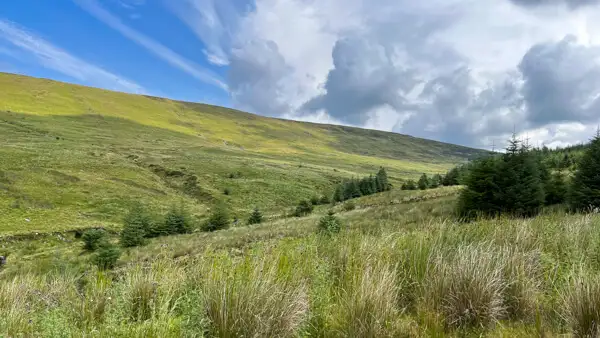
The photo of the mountain is beautiful. It becomes more interesting if you photograph it through a group of trees (for example). Then the mountain is nicely framed and the viewer gets more information in the picture.
You can also sit or lie down and combine the flower meadow in front of you and the mountain in the distance behind it in your photo. This is especially true for wide-angle photography – create a foreground: several stones in front of the mountain lake with mountains behind it, or moss in the foreground, a beautiful meadow in the background, or… there are many possibilities.
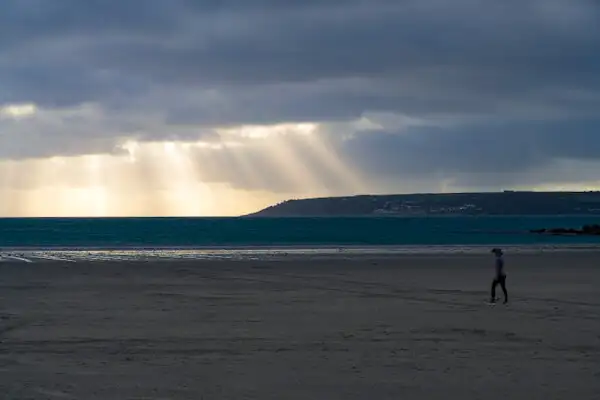
Pay attention to the light
The viewer’s gaze always follows the light. Example: The meadow in the foreground is in the light, the mountain slope behind it in the shade – doesn’t work. If you wait a moment for the light to fall on the object you want to show, it will look much better.
But everything in the light? Where should the viewer look then? Better: make the foreground a little darker and the important elements behind it a little brighter – then the eye wanders from the foreground, ideally across the centre of the picture to the object in the background. You can also combine this well with leading lines.

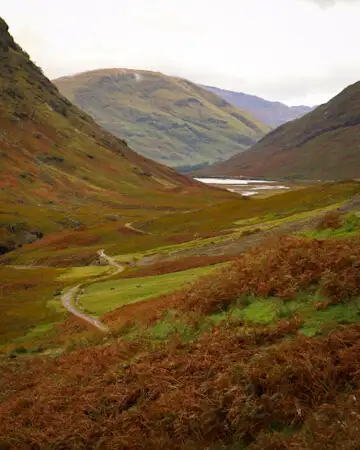
Colour and contrasts in the picture
You can also guide the viewer’s gaze with colours, for example: dark green plants in the foreground, purple heather behind, or dark green trees as a frame, medium-sized meadow behind, a white-flowering cherry tree behind (the object).
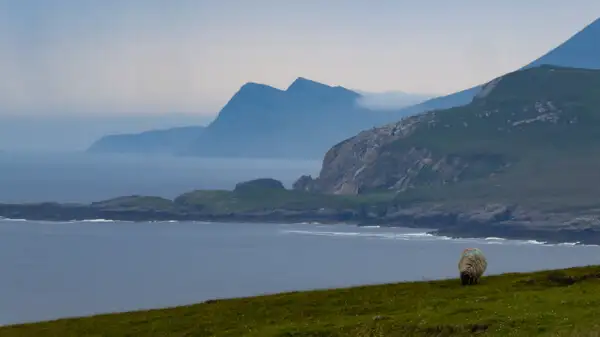
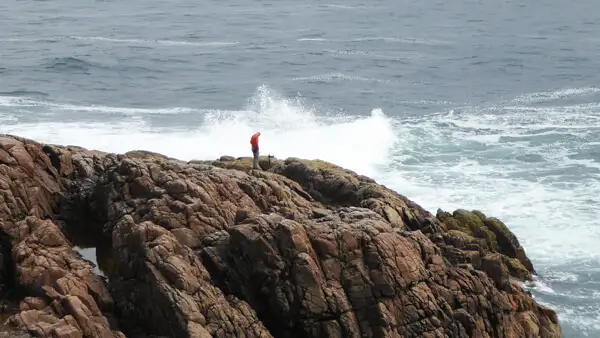
In a predominantly monochrome landscape, individual splashes of colour or different contrasts bring more stimuli into the picture on which the viewer’s eye can linger. For example: red fishing boats on a blue sea, walkers with yellow jackets on a mountain slope, white sheep in a brown moor, and so on.
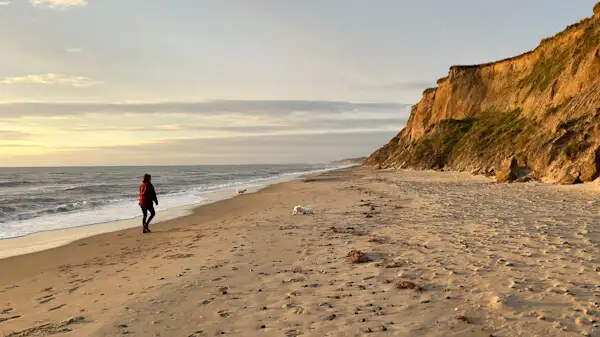
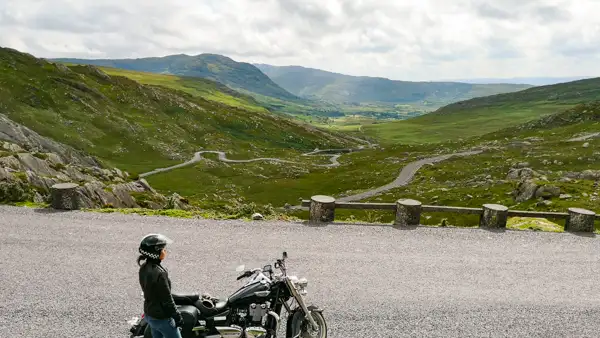
Scales and people in the picture
Excuse me? No, you don’t need to take a tape measure with you. It’s just about visualising the sheer size of the landscape. Is the rock big, or huge? Put a person next to it (or on top of it) and you have a yardstick!
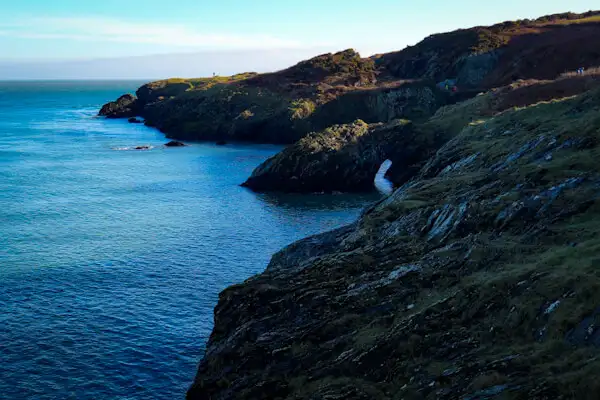
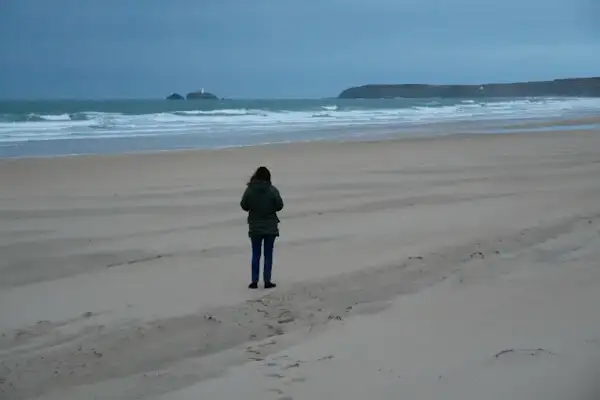
The same goes for tiny specks of people on a huge beach, tiny boats in front of a high cliff or tiny sheep in front of a massive mountain range.

If you don’t have people available, animals, cars or other objects in the picture whose size we can judge will do.
But it’s not just about size, many viewers like to see people in the picture, no matter how big they are. They enrich the landscape and make it easier to imagine yourself standing where it is so beautiful.
Tip number 4: Follow your instinct
You think a photo that doesn’t follow any rules is cool? Then it’s cool too – at least for you. And probably for others too.
You can’t go wrong with digital photos, at worst they become file corpses or you can delete them – it’s all good. E xperiment, try and dare to do nonsense. You don’t have to post every photo on Instagram (only the better ones).
I learnt from an excellent professional photographer who said: 70-90% of his pictures are ‘rubbish’. But the remaining good pictures get better and better over the years!
Be always ready to shoot
You get out of the car, see a great landscape – and do nothing with it… missed opportunity.
You always have a smartphone in your pocket and you can put your camera bag on the back seat ready to hand. One touch – and you’ve taken 3-5 pictures. Not all of them will be good, but you’ll be happy about many of them afterwards – I promise.
It’s often a coincidence that the children have to go to the bush exactly where you have a magnificent view of the coast – and the light is right too!
If you are always prepared to take a few minutes in between on your journey – at every opportunity (!!!), then you will come home with lots of beautiful photos. And you can always trade off a few minutes every now and then.
My wife and I often split up for an hour or two when we go somewhere. Then she can look at what she likes and I can take photos in the meantime. That works in towns, villages or at places of interest, but it also works at a beach car park or a mountain inn. Afterwards, we go out for a meal and share our impressions – good, right?
So, as always, my quick tips have become a bit longer. I hope you were able to take something away from it for yourself.
If you’re a beginner and are a little overwhelmed by the abundance, why not make a note of just one or two points that particularly appeal to you and try them out? You can also do this without travelling – with your smartphone while walking outside.
I often do it like this – when I go for a walk, I try something out. The photos don’t have to be great, especially if the landscape outside your front door is rather boring – but you internalise your photographic ‘toolbox’ for the next trip or holiday.

Und mit der Zeit kannst du weitere Tipps ausprobieren und nach und nach verinnerlichen. So baust du deinen fotografischen „Werkzeug-Kasten“ für die nächste Reise auf und deine Augen gewöhnen sich daran, Licht und Farbe, Kompositionen und gestalterische Möglichkeiten besser zu sehen – immer schneller.
Und bis zu deiner Reise geht das dann schon so automatisch, dass du deine schönen Landschaftsfotos schnell, nebenbei und dazu noch Familien-verträglich machen kannst.
Viel Spass mit deiner Reise-Landschafts-Fotografie!
More interesting articles for you
Which lenses for travel photography?
Better travel photos in poor light
Versatile full-frame cameras for travel photography
ZEN – OR THE ART OF TAKING A GOOD TRAVEL PHOTO
Picture credits cover picture: Three Sisters Glencoe (Photo: Ulrich Knüppel-Gertberg)